For Developers · Dashboard
Key Management
Key Management is where you generate, edit, and revoke keys for your service. The page is split into three tabs — Generated Keys (keys you have created but not yet been validated by a user), Active Keys (keys that have been validated and bound to a device), and Keyless/Whitelisted (HWID-only access for users without a key). Each tab has different operations available based on the key's lifecycle stage.
The key lifecycle in one paragraph
Generated Keys
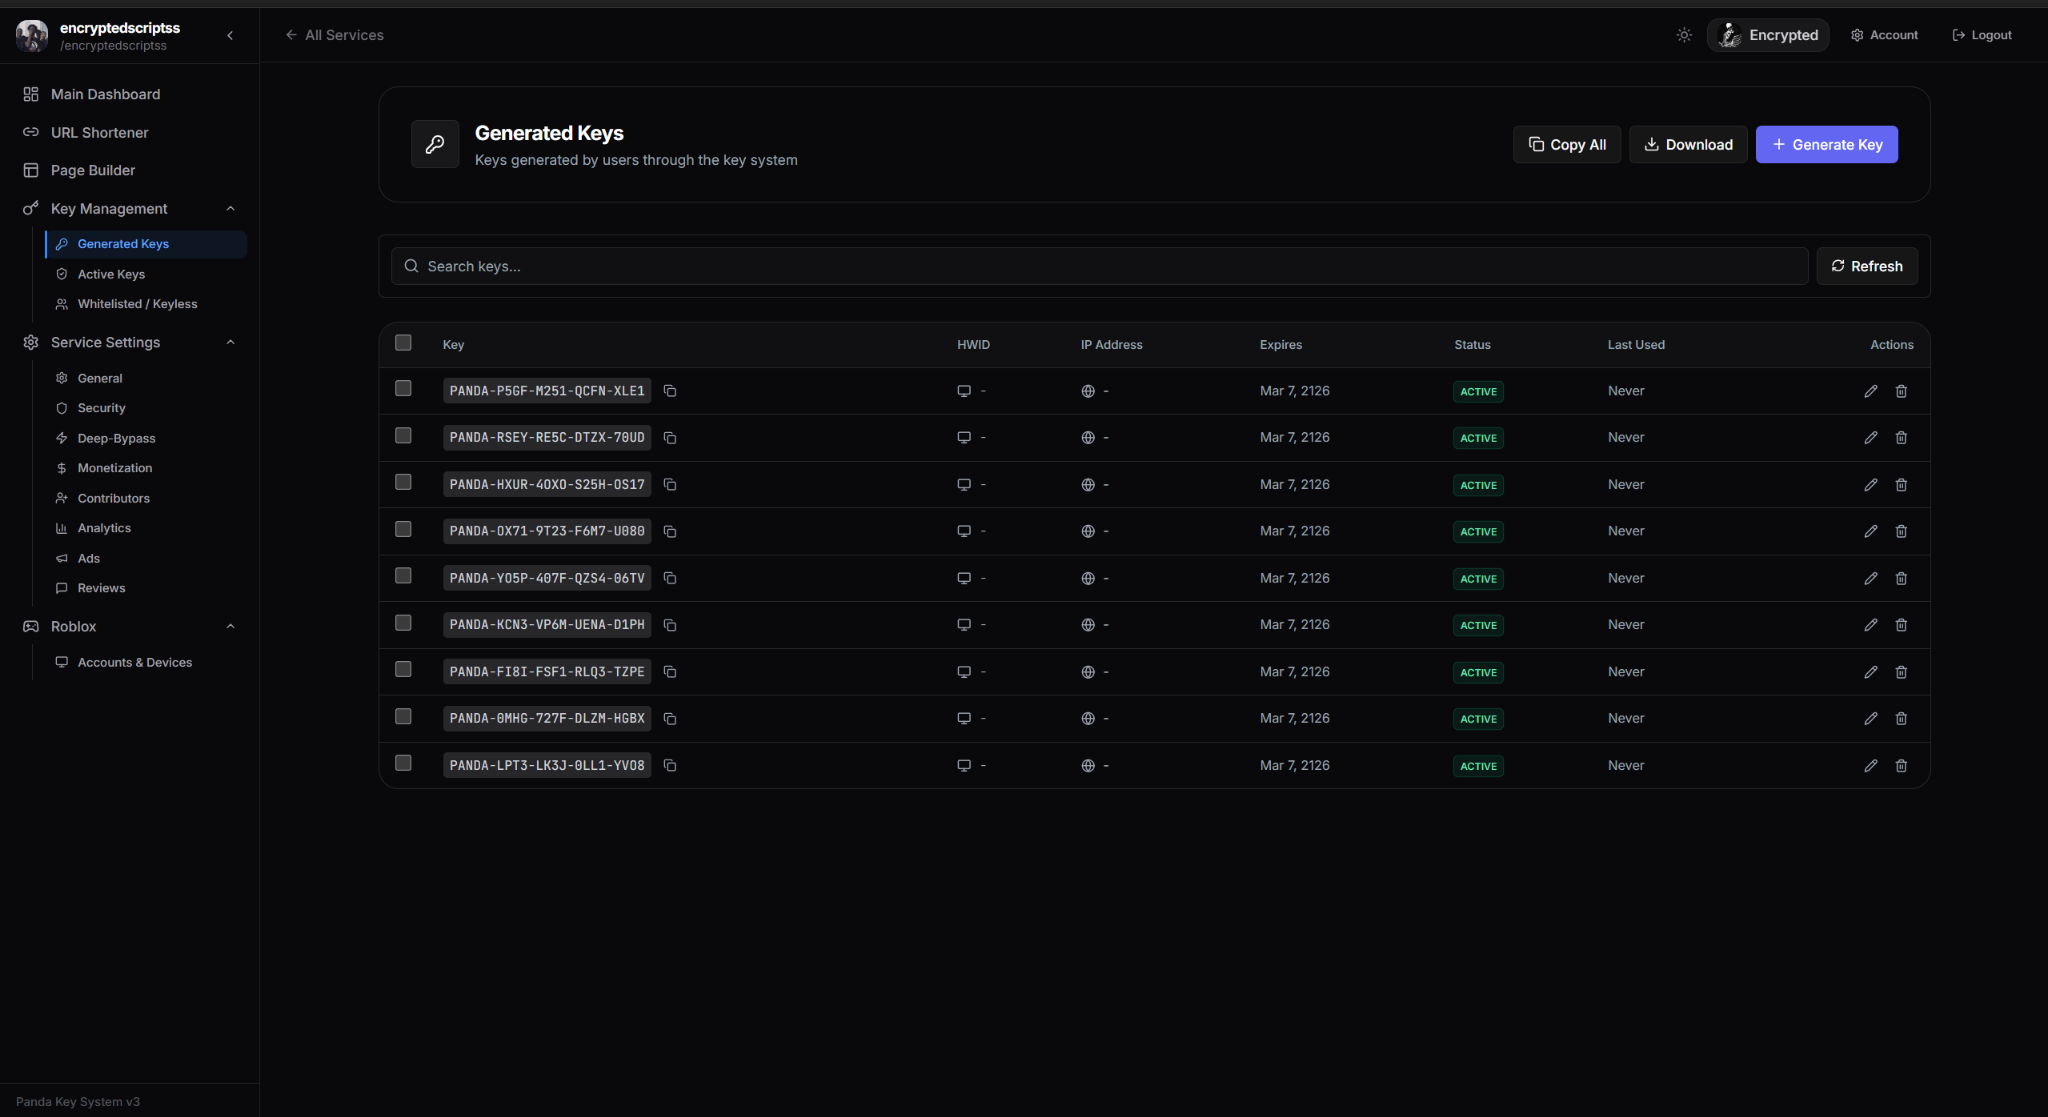
The Generated Keys tab is your key creation and pre-validation inventory. Every key you generate yourself (or through our API) lands here first. From this tab you can create new keys, edit their settings, and delete unused keys before they have been claimed by a user.
Generating a new key
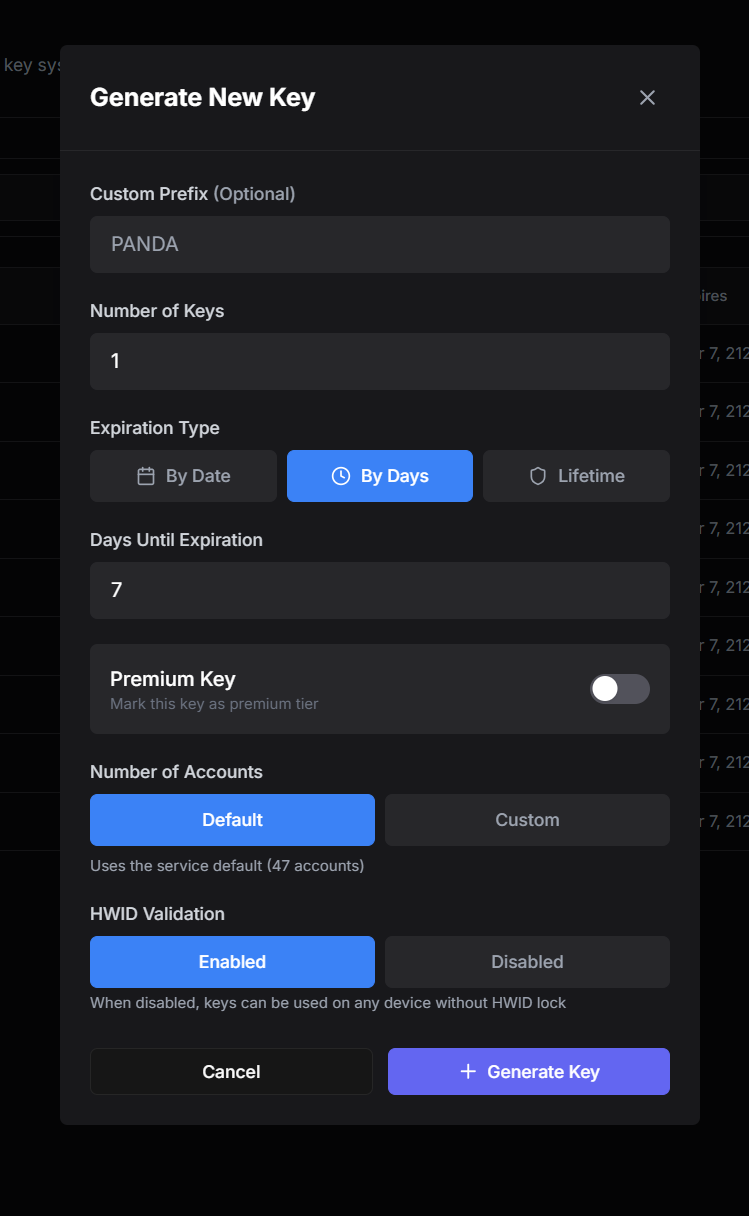
Click Generate New Key to open the creation form. You configure the key's attributes here; once saved the key is added to the Generated Keys list and is ready to be handed to a user.
Prefix
Optional. A custom prefix prepended to this specific key, overriding your service's default Key Prefix from General Settings. Useful for distinguishing batches — for example, generating a batch of giveaway keys with prefix GIVEAWAY_ so your support workflow can tell them apart from sold keys at a glance.
Number of Keys
How many keys to generate at once. Generate one for a single user, or batch-generate hundreds for a giveaway or paid keystore export.
Expiration Type
Two ways the key can expire. You pick which one applies:
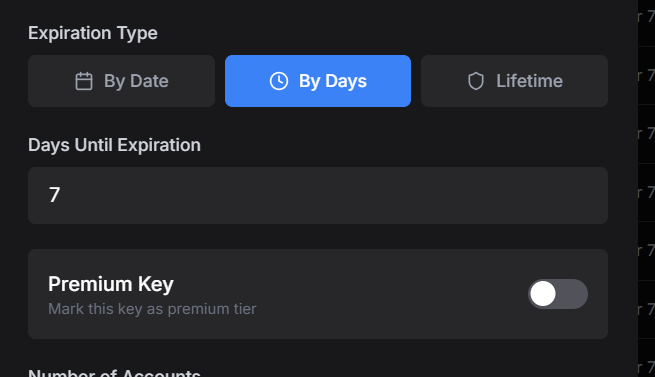
- By Date — a fixed calendar date. The key expires at that exact moment regardless of when the user validated it. Example: you generate a key on 06/04/2026 with expiration set to 06/06/2026. If the user redeems it on 06/05, they only get 1 day of use. If they redeem it on 06/06, the key is already expired and validation fails.
- By Days — a duration that starts counting from validation. Example: 7 days expiration. The user redeems the key on day 4 after you generated it — the key still works for the full 7 days from the day they redeemed, expiring at day 11 from your generation date. The user always gets the full duration regardless of how long it sat unredeemed.
Which to pick
Premium Key
A boolean toggle. When on, the key returns isPremium: true on validation. Your script or software can check that value and unlock premium features for those users. When off, the key returns isPremium: false and unlocks only the standard tier.
What "premium" actually means is up to you — Panda Auth does not enforce a specific premium feature set. You decide what premium unlocks in your software, and this flag tells your code whether the validating key has earned that tier.
Number of Accounts
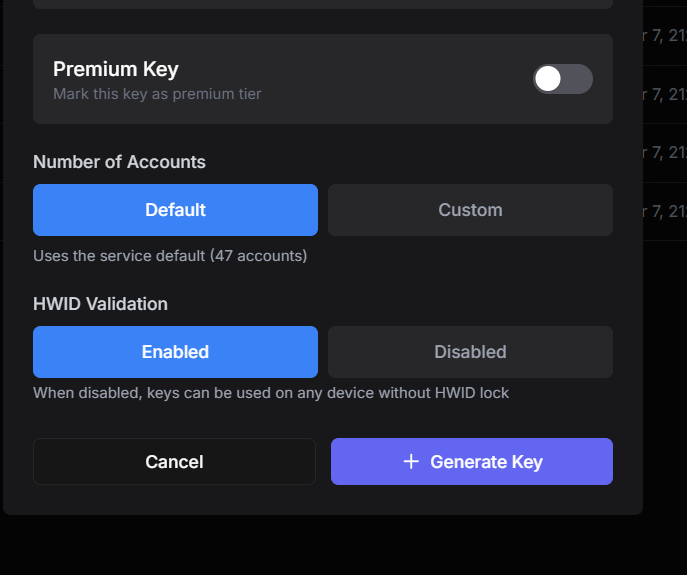
Limits how many platform accounts can use this single key on the same device. Common scenario: a Roblox executor where one HWID may have multiple Roblox accounts. Set to 1 for the strictest one-account-per-key flow, or higher to allow household-style sharing.
HWID Validation
When enabled, the key is bound to the first device that validates it. When disabled, the key validates anywhere — the HWID is ignored. Disabling is rare and weakens anti-piracy significantly; use only when you specifically need a transferable key (a giveaway prize, a key sold with explicit device-transfer rights).
Editing and deleting generated keys
Every row in the Generated Keys list has edit and delete actions. You can adjust any of the key's settings before it has been validated, or delete the key entirely if you want to cancel it before the user redeems.
Why generated keys have no HWID yet
Active Keys
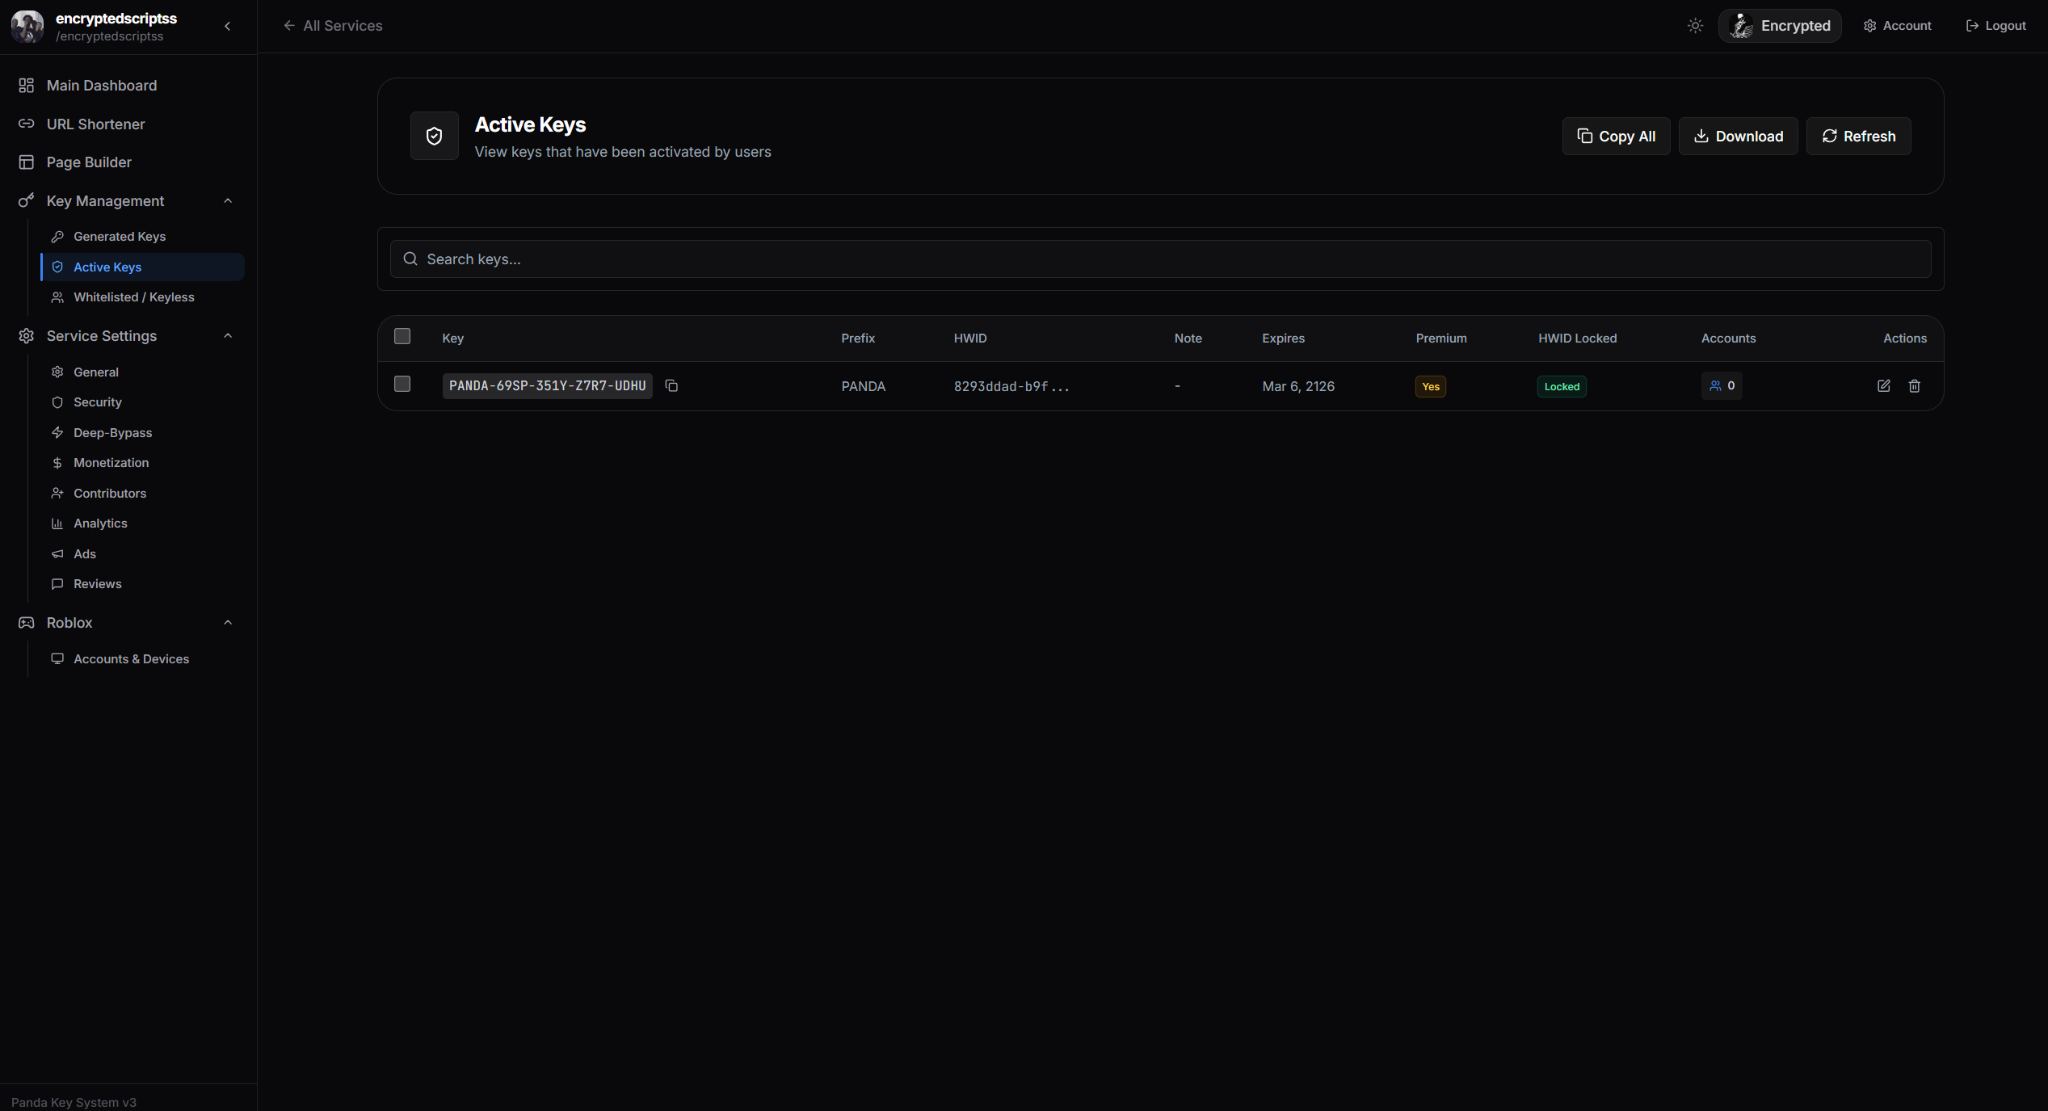
The Active Keys tab is your post-validation key inventory. Every key here has been redeemed by a user and is bound to their device. The settings you configured at generation came along with the key — prefix, expiration, premium flag, account limits — and you can still edit, delete, blacklist, or suspend any individual key from this page.
Available actions
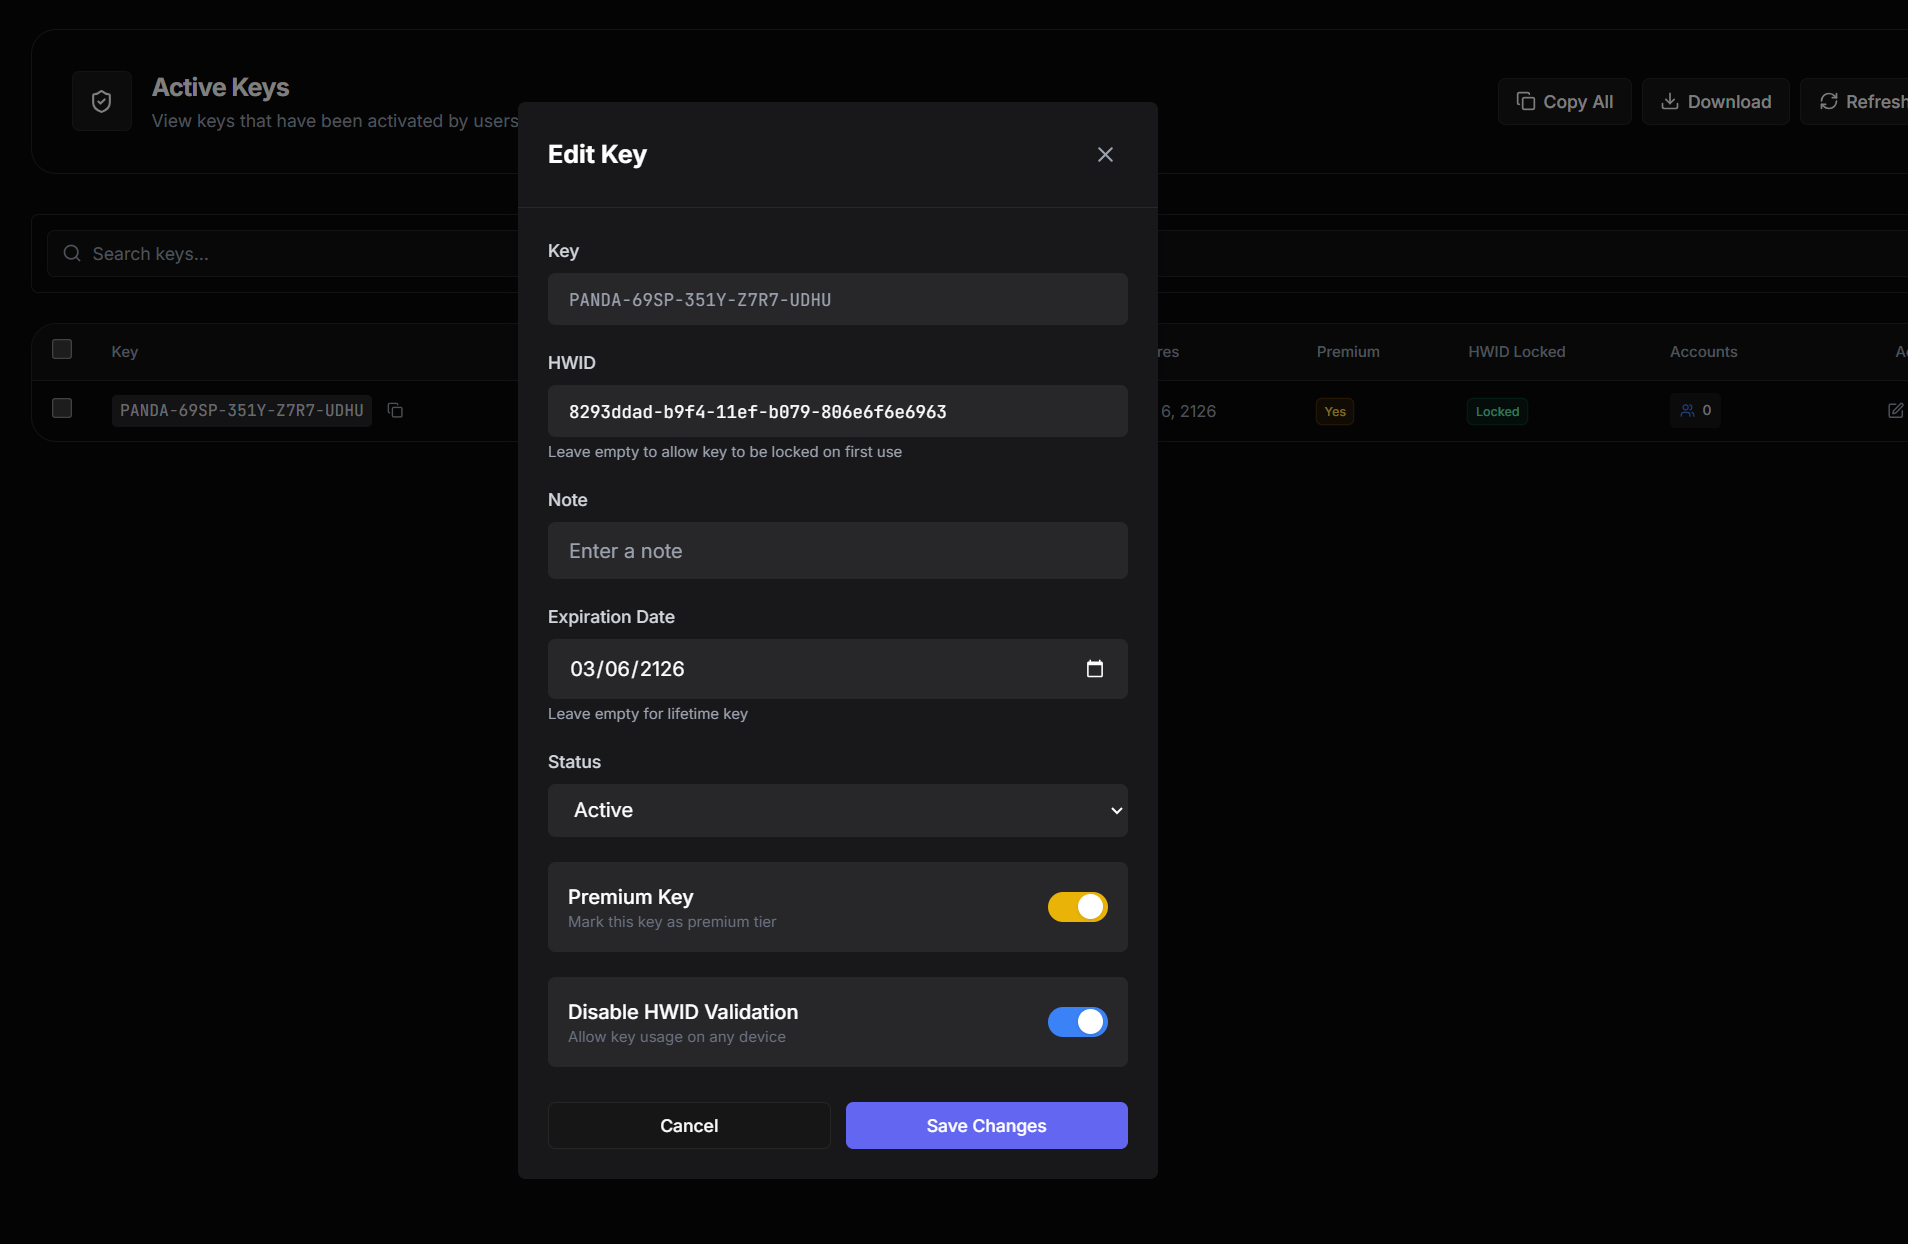
- Edit — adjust the key's settings post-validation. Useful for extending an expiration for a specific user as a goodwill gesture, or fixing a setting you got wrong at generation time.
- Delete — remove the key entirely. The user loses access immediately on next validation attempt.
- Blacklist — bans the HWID associated with this key. The user cannot generate or redeem any new keys for your service until the blacklist is lifted.
- Suspend — temporarily disables the key without deleting it. The user gets "invalid" on validation, but you can re-enable it later if the suspension was a mistake or the issue is resolved.
Blacklist vs Suspend vs Delete — pick the right one
- Delete when the key was a mistake or a test.
- Suspend when you suspect abuse but want to be able to undo it (chargeback in progress, customer complaint under investigation).
- Blacklist when you have caught the user attempting bypass exploits and want them locked out of your service permanently.
Keyless / Whitelisted
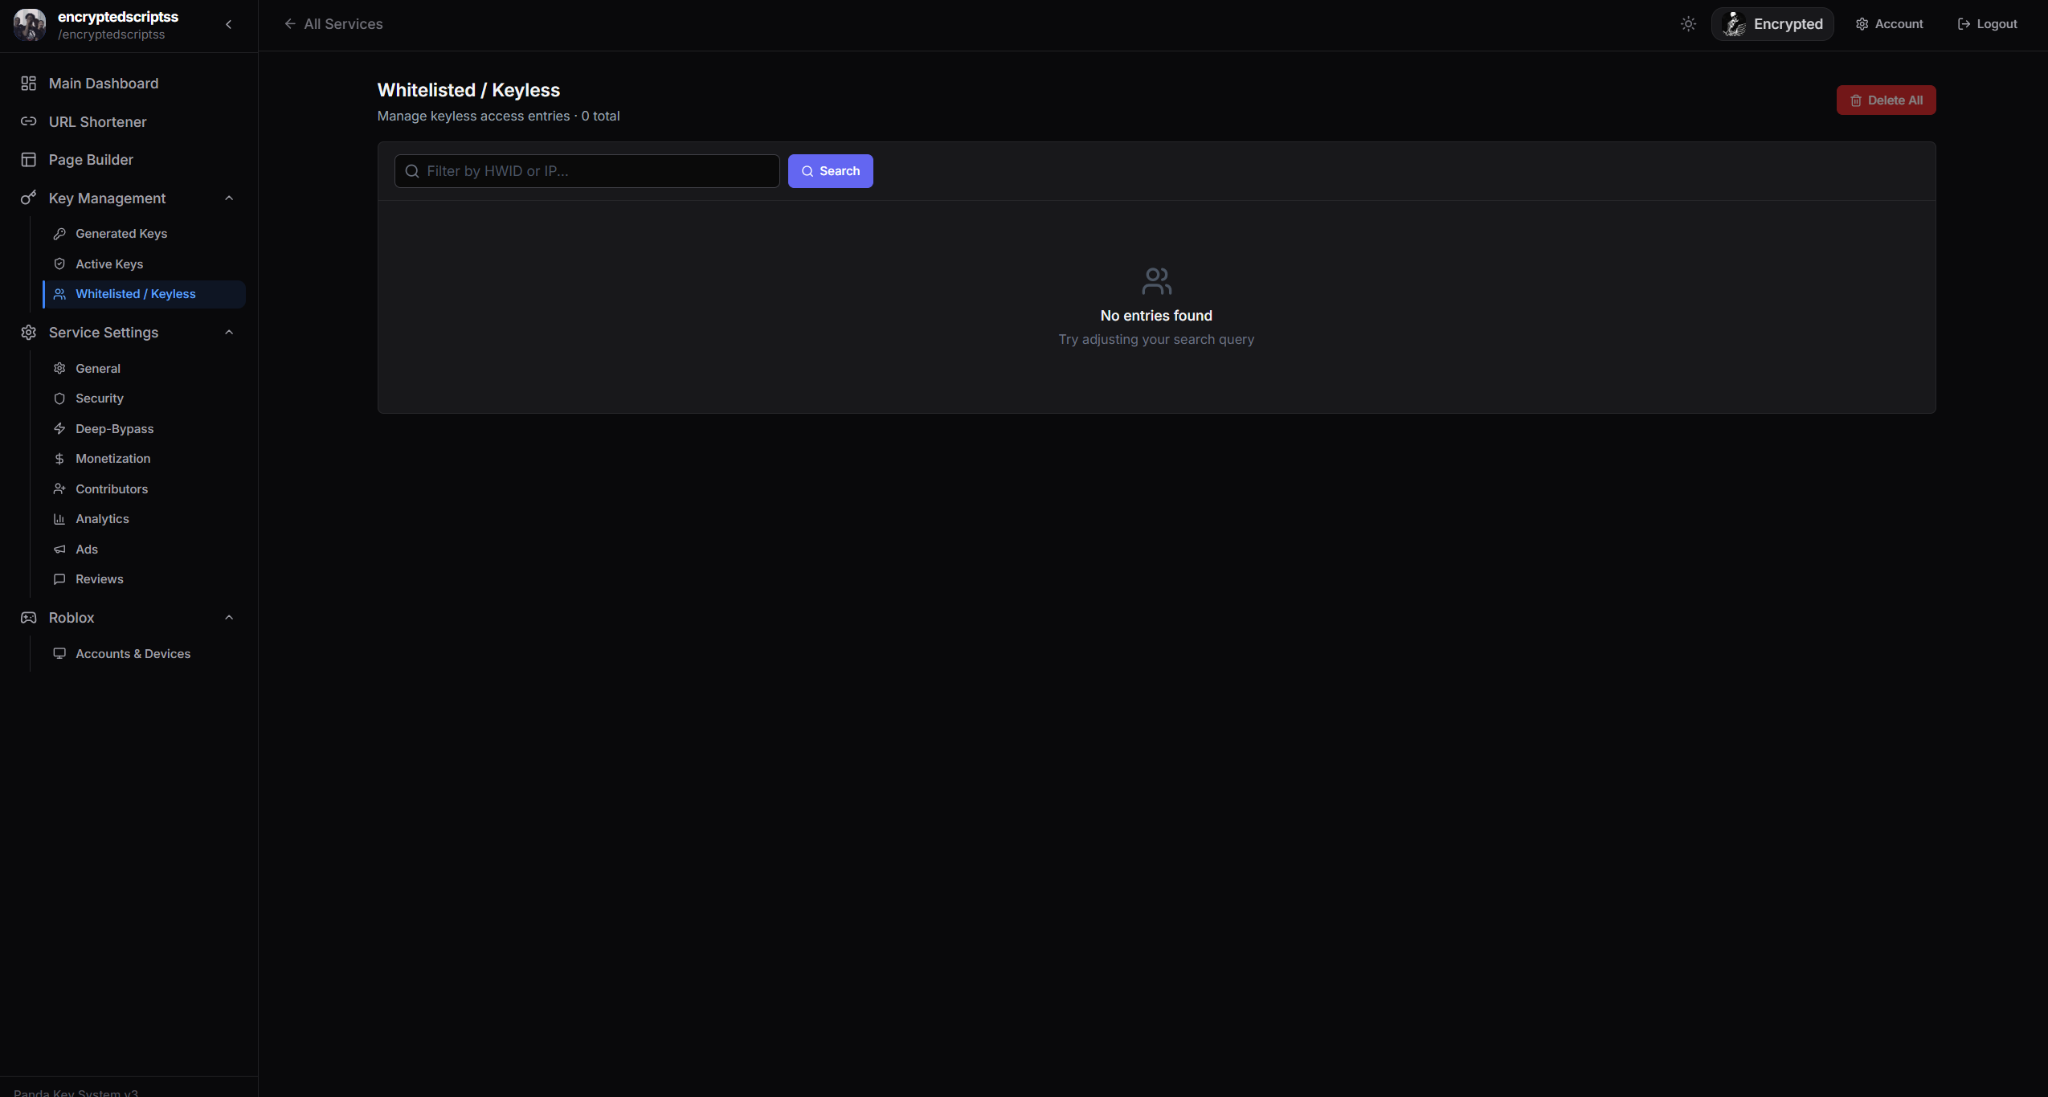
The Keyless / Whitelisted tab is for HWID-only access — no keys, just a list of approved devices. Anyone whose HWID is on this list validates successfully without ever entering a key. This is the most stripped-down access model and pairs well with private beta groups, internal team tools, or trusted-user rosters.
Library support is limited
When to use Keyless
- Private beta groups where you know every tester and want to add them by HWID.
- Paid customer rosters where you manage purchases manually and want to bypass the get-key flow for verified customers.
- Internal team tools where everyone using the software is on your team and frictionless access matters.
When to use regular keys instead
- Public-facing services where users earn or buy keys through your get-key flow. Keyless would skip your monetization entirely.
- Large user bases where manually adding HWIDs is impractical.
- Anti-piracy is critical — keyless gives up some flexibility because there is no key to track or revoke independently of the HWID itself.
Mass Compensation
Mass Compensation adds extra days to every eligible key in the service at once. It is the goodwill tool for when your script breaks, a game update ships, or you have downtime and want to give all of your users free extra time without editing thousands of keys one by one. You will find a Compensate button on both the Generated Keys and Active Keys tabs, and a Compensation page under Key Management that lists every compensation you have run.
Running a compensation
Click Compensate, pick how many days to add (1–365), and choose what it applies to:
- Both — every active key and every generated key.
- Active Keys — only keys already redeemed and bound to a device.
- Generated — only keys created but not yet redeemed.
Before you confirm, the dialog shows a live count — how many keys will be extended and how many lifetime keys are being skipped — so you know the exact impact.
How the days are added
The chosen number of days is added to each key's current expiry. A key that expires in 10 days becomes 13 after a +3 compensation. An already-expired key moves forward from its old expiry date, not from today.
Lifetime keys are always skipped
History and undo
The Compensation page is a running log — think of it like a commit history. Each compensation is one entry showing when it ran, who ran it, how many days it added, how many keys it touched, and its status. Every applied compensation has a Revert button.
Reverting subtracts the same number of days back from exactly the keys that compensation originally touched (keys deleted since are skipped), then marks the entry as reverted. A compensation can only be reverted once.
Reverts stack cleanly
Who can run it