For Developers · Dashboard
Create Your First Service
A service is the unit of work in Panda Auth — it represents one piece of software you ship, with its own keys, settings, get-key page, monetization, and analytics. You can run multiple services from a single account, but every service starts here. This page walks through creating your first one and getting it ready for users.
Step 1 — Create the service
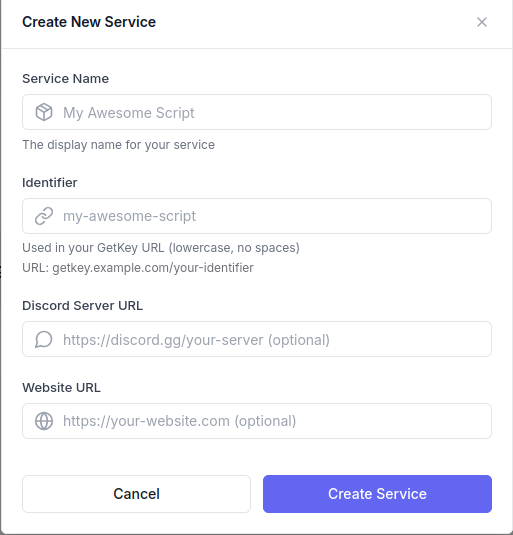
From your dashboard, click Create Service (or the new service button). The form asks for a few essentials:
- Service Name — the public-facing name. Shows up on your get-key page header. Use whatever name your community already knows you by.
- Service ID (Identifier) — the slug that identifies your service in every URL, API call, and library integration. Pick something short and lowercase. This is hard to change later, so get it right the first time. See General Settings for the full rationale.
- Discord URL — optional. The invite link to your community server.
- Website URL — optional. Your project's main website if you have one outside Panda Auth.
The Identifier is permanent (for practical purposes)
Step 2 — Configure the basics
With the service created, you land on its settings page. The first things worth setting:
- Key Prefix — a short brand string prepended to every key generated for this service. Example: setting it to PANDA produces keys like PANDA_a8sdnwj.... Pure cosmetic, but useful for branding and for distinguishing keys from different services in your support logs.
- Webhook URL — if you want real-time notifications about key activity (validations, generations, HWID resets, blacklist actions), paste a Discord webhook URL here. Full configuration is in Webhooks & Analytics.
- Discord Server / Website URLs — confirm or update the values you set during creation.
Step 3 — Your service dashboard
Once the basics are in, your service dashboard looks something like this:
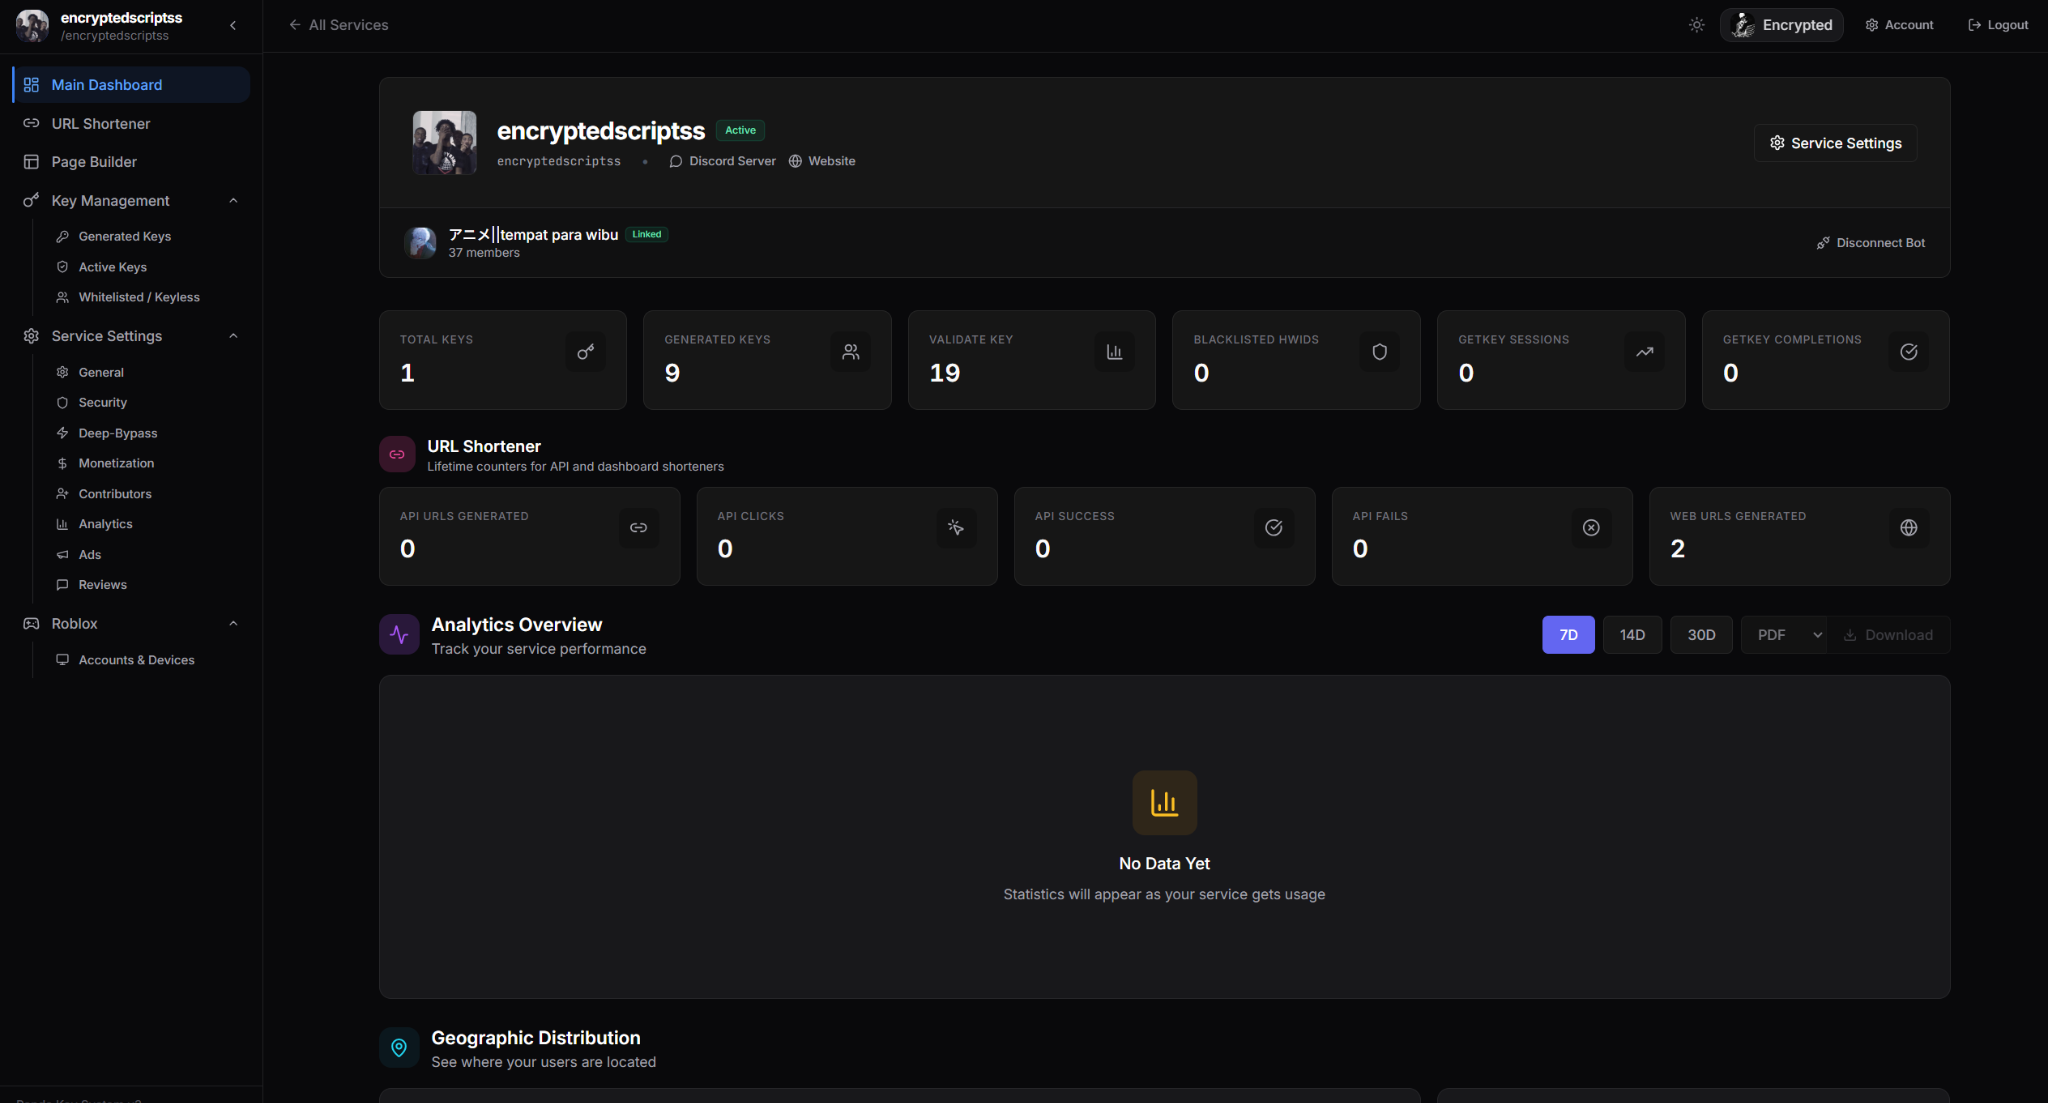
From here you have everything Panda Auth offers — Security, Monetization, Appearance, Key Management, the Vault, Client Connect, and more. The other pages in this section walk through each one in detail.
What to configure next
A few sensible next steps before you launch:
- Appearance — upload your logo, set the button gradient, pick a background. A branded get-key page converts way better than a default one.
- Monetization → Revenue Settings — connect at least one ad provider. Without this you won't earn anything from checkpoints.
- Security → Protection — turn on the basics: Bot Bypass Lockdown and the Precheck Captcha Layer. The defaults are sensible; verify them before launch.
- Security → Checkpoints — pick Variable mode and set the per-duration checkpoint counts. Or pick Standard if you want every user to follow the same flow.
- Webhooks & Analytics — wire up a Discord webhook so you get notified when keys validate.
You're ready to ship
There's a lot here — take it section by section